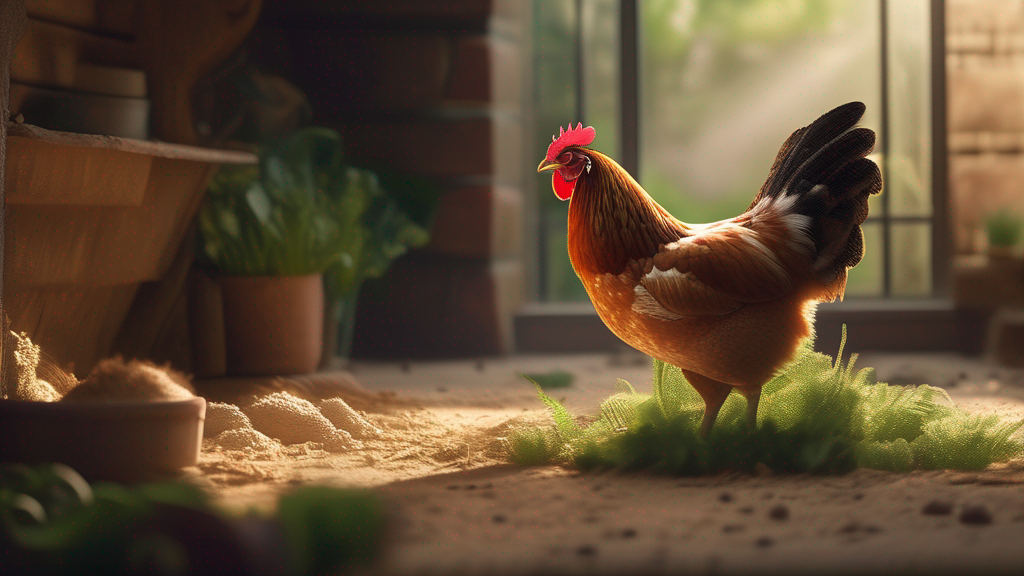
Poultry mites and lice are among the most common external parasites affecting backyard flocks. These tiny pests feed on chicken blood or skin debris, causing irritation, stress, reduced egg production, anemia, and in severe cases, illness or death. Effective identification, treatment, and prevention of mites and lice are essential for flock health and well-being. This comprehensive guide covers types of parasites, how to recognize infestations, treatment methods (chemical and non-chemical), coop sanitation, preventive practices, safety considerations, and ongoing monitoring to maintain a pest-free environment.
1. Understanding Chicken Mites and Lice
External parasites on chickens fall into two main categories: mites and lice. Though both live on the bird or in its environment, they differ in life cycle, behavior, and treatment approaches.
1.1 Types of Mites
- Red Mites (Dermanyssus gallinae): Also called poultry red mites. Nocturnal blood feeders: they hide in cracks and crevices by day and feed on birds at night. They can survive off-host for weeks, making eradication challenging.
- Northern Fowl Mites (Ornithonyssus sylviarum): Spend most of their life on the host, especially around vent area and under feathers. Feed continuously, causing constant irritation and potential anemia.
- Scaly Leg Mites (Knemidocoptes mutans): Burrow under leg scales, causing thickening, crusting, and deformity of legs and feet. Severe infestations cause discomfort and affect mobility.
- Depluming Mites (Knemidocoptes spp.): Can burrow into skin or feathers, causing feather loss, skin irritation, and secondary infections.
1.2 Types of Lice
- Chicken Body Lice (Menacanthus stramineus): Feed on skin debris and blood, often around vent, breast, and under wings. Visible crawling on feathers; cause irritation and feather damage.
- Head Lice (Lipeurus caponis): Found primarily on head, neck, and under wings. Smaller than body lice but similarly irritating.
- Wing Lice (Menopon gallinae): Colonize wing feathers and underwings. Feed on skin and feather debris.
2. Recognizing Infestations
Early detection is critical to prevent severe health impacts. Signs of mites or lice infestations in chickens include:
- Increased Preening and Scratching: Birds frequently scratch themselves, rub against surfaces, or shake feathers.
- Feather Damage: Broken feathers, bare patches, or poor feather quality due to constant irritation.
- Pale Comb and Wattles: Blood loss from heavy infestations can cause anemia, visible as pale comb, wattles, and eyelids.
- Reduced Egg Production: Stress lowers laying rates or causes shell quality issues.
- Weight Loss or Lethargy: Chronic irritation and blood loss weaken birds; they may appear listless.
- Visible Parasites:
- On the Bird: Small crawling insects among feathers, especially around vent, under wings, or on legs. Lice move slowly; mites may be seen when parting feathers.
- In the Coop: Dark specks or blood spots on bedding or roosts (signs of red mites feeding and dropping). White or yellowish crusts on legs suggest scaly leg mites.
- Restlessness at Night: Birds may appear unsettled during roosting if red mites are active and feeding at night.
To check for parasites:
- Part feathers around vent, under wings, and along breast to spot mites or lice moving.
- Examine leg scales for crusting or raised appearance.
- Inspect roosts, nesting boxes, and cracks for hiding mites (especially red mites): look for tiny moving dots or dried blood spots.
- Collect a few feathers and shake over white paper to see crawling lice or mite debris.
3. Treatment Methods
Treatment depends on parasite type, severity, and whether treating individual birds or entire flock/environment. A combined approach targeting both birds and environment is essential, especially for red mites which hide off-host.
3.1 Non-Chemical Treatments
- Dust Baths with Diatomaceous Earth or Other Powders: Offer dust baths containing food-grade diatomaceous earth (DE) or wood ash mixed with sand. Dust baths can help control lice and some mites on birds, though not fully effective against heavy infestations or scaly leg mites.
- Manual Removal: For scaly leg mites, soak legs in warm soapy water or antiseptic solution to soften crusts, then gently scrub to remove crust layer before applying treatment. Always handle gently to avoid injury.
- Frequent Coop Cleaning: Remove and replace bedding regularly. Scrub and disinfect surfaces, nesting boxes, roosts, and cracks to reduce environmental populations. High-pressure steam cleaning or heat treatment can help eliminate mites hiding in crevices.
- Isolation: Quarantine newly acquired birds until treated and confirmed pest-free. During outbreak, isolate heavily infested birds for targeted treatment and to prevent spreading.
- Temperature Management: Some keepers use heat (e.g., heat lamps in unoccupied coop sections or warm wash) to target mites in the environment, but must be done carefully to avoid damage to coop materials or risk of fire.
- Physical Barriers: Seal cracks, crevices, and gaps in coop structure where mites hide during daytime. Use hardware cloth, sealants, or metal flashing to close hiding spots.
3.2 Chemical and Veterinary-Approved Treatments
Chemical treatments can be highly effective when used correctly. Always follow label directions and safety precautions. Common options include:
| Treatment Type | Application | Target Parasite | Frequency | Pros | Cons / Precautions |
|---|---|---|---|---|---|
| Permethrin Sprays or Dusts | Spray or dust directly onto birds (avoiding eyes), and on coop surfaces, roosts | Lice, mites (including northern fowl mites), red mites in environment | Repeat after 7–10 days; follow label | Effective knockdown; long residual activity on surfaces | Avoid inhalation; use protective gear; rotate products to prevent resistance |
| Pyrethrin-based Aerosols or Sprays | Apply to birds and coop; often short residual | Lice, some mites | Repeat per instructions (often weekly until clear) | Fast knockdown; lower toxicity to birds when used correctly | Shorter residual; may need frequent reapplication; avoid direct contact with birds’ eyes and respiratory tract |
| Ivermectin (Oral or Injectable) | Administer via water or injection under veterinary guidance | Systemic control of mites and lice feeding on blood (e.g., northern fowl mites) | Single or repeated dose per veterinary protocol | Targets parasites feeding on treated bird; can reduce environmental load | Must follow withdrawal periods if birds are for egg/meat; veterinary prescription; potential residues |
| Sulfur-based Powders or Sprays | Apply to legs for scaly leg mites after soaking; also in environment | Scaly leg mites | Multiple applications over weeks until healed | Effective for burrowing mites; relatively low cost | May irritate skin if overused; ensure proper dilution |
| Carbaryl (Sevin) Dust | Dust coop surfaces, bedding; avoid direct heavy application on birds | Environmental mite control | Follow label; often every few weeks during infestation | Effective environmental knockdown | Potential toxicity; use sparingly; avoid direct contact with birds and eggs; follow regulations |
| Organophosphate-based Treatments | Spray or dust under strict veterinary guidance | Resistant mites or severe infestations | As prescribed | Potent against resistant parasite populations | Higher toxicity; require careful handling, safety equipment; strict withdrawal times |
Note: Always read and follow local regulations and veterinary advice for any chemical use. Some treatments require withdrawal periods for eggs or meat if birds are used for production.
3.3 Natural and Alternative Remedies
- Essential Oil Sprays (e.g., neem, lavender, eucalyptus): Mixed with carrier oils or water; applied lightly to feathers. May repel lice and mites, but efficacy varies. Use caution: dilute properly to avoid skin irritation and avoid inhalation hazards for birds.
- Herbal Dust Baths: Mixtures of sand, diatomaceous earth, wood ash, and dried herbs (e.g., neem leaf powder, rosemary) offered in dust bath. Can deter parasites on feathers but not sufficient alone for heavy infestations.
- Vinegar or Garlic Supplements: Some keepers add diluted apple cider vinegar or garlic in drinking water, aiming to alter blood chemistry making it less attractive to parasites. Evidence is anecdotal; not a standalone treatment.
- Biological Controls: Use of predatory mites in the environment (experimental) to reduce poultry mite populations; not widely practiced and requires expertise.
- Regular Dust Bath Encouragement: Providing ample dust bathing area helps birds keep feather parasites in check naturally. Ensure substrate stays dry and replenished.
Alternative methods can be part of integrated pest management but should not replace proven treatments in serious infestations.
4. Coop and Environment Sanitation
Treating birds alone is insufficient if the environment remains infested. A thorough coop sanitation routine is critical:
4.1 Emptying and Cleaning
- Remove all birds to a safe holding area during cleaning.
- Remove bedding, nesting material, and debris; dispose or treat appropriately.
- Scrub all surfaces—walls, floors, roosts, nesting boxes—with hot water and poultry-safe disinfectant.
- Pay special attention to cracks, crevices, joints, corners, and hardware cloth edges where mites hide.
- Allow surfaces to dry completely; moisture can harbor mites or facilitate microbial growth.
4.2 Environmental Treatments
- Apply approved residual insecticides or miticides to coop surfaces after cleaning, following label instructions.
- Consider heat treatment where feasible: raising coop temperature to levels lethal to mites (requires caution and equipment).
- Treat movable items (perches, nest boxes) separately, ensuring thorough coverage and drying before reintroduction.
- Replace or launder washable items (cloth, curtains) at high temperature to kill parasites.
- Rotate or rest ground areas: if movable pens or portable coops, shift location periodically so that environment breaks parasite life cycle.
4.3 Ongoing Sanitation Practices
- Maintain clean, dry bedding; replace frequently during peak infestation risk or after rainfall.
- Regularly inspect and clean nest boxes; provide clean nesting material to minimize hiding spots.
- Seal cracks or gaps that cannot be cleaned easily; line corners with smooth materials for easier cleaning.
- Monitor humidity and ventilation: damp, poorly ventilated coops favor parasite survival.
5. Prevention Strategies
Prevention reduces the likelihood and severity of infestations. Key practices include:
5.1 Regular Inspection and Monitoring
- Schedule routine checks of birds (vent area, under wings, legs) for parasites at least monthly or more often in warm months.
- Inspect coop environment weekly: roosts, nesting boxes, and hidden areas for signs of mites (dark spots, moving specks).
- Keep records of inspections and any findings to track seasonal patterns or recurring issues.
5.2 Quarantine New Birds
- Isolate new arrivals for 2–4 weeks, treating prophylactically for mites and lice before introducing to main flock.
- Inspect new birds thoroughly; apply treatments as needed even if no visible parasites, as early infestations can be hard to detect.
5.3 Environmental Design
- Build coop with minimal crevices: use smooth surfaces, sealed joints, easy-to-clean materials.
- Elevate perches off the ground but ensure they are not too high to cause injury; design perches for easy inspection and cleaning.
- Provide ample dust bath areas in shaded, dry spots; replenish substrate regularly.
- Avoid overcrowding: maintain appropriate stocking density to reduce stress and ease monitoring.
5.4 Seasonal and Climatic Considerations
- Parasite pressure often rises in warm, humid seasons; increase inspection frequency during these periods.
- Dry, well-ventilated coops deter mite survival; use fans or improved airflow if climate permits.
- In colder months, treat environment if mite activity persists, since some mites can survive indoors year-round.
5.5 Nutritional and Health Support
- Maintain birds in optimal health: well-nourished birds resist parasites better and recover faster from infestations.
- Supplement vitamins or minerals when indicated, especially during stress periods (molting, heat stress) to support immune function.
- Encourage regular dust bathing and foraging behavior, which helps birds naturally manage minor parasite loads.
6. Safety Considerations When Treating
Treatments often involve chemicals; safety for birds, humans, and environment is paramount.
- Follow Label Instructions: Always read and adhere to product labels regarding dosages, application methods, protective equipment, withdrawal periods (if eggs/meat used), and disposal.
- Protective Gear: Wear gloves, masks, and protective clothing when handling insecticides or dusty powders to avoid inhalation or skin contact.
- Bird Safety: Avoid applying treatments near eyes, nostrils, or delicate skin areas. Ensure birds are not overheated or stressed during application.
- Environmental Impact: Use treatments approved for poultry and avoid contaminating water sources or vegetation that might harm other animals or beneficial insects.
- Residue and Withdrawal: Observe recommended withdrawal times for eggs or meat if using systemic treatments. Keep treated birds separate if necessary until safe.
7. Monitoring and Follow-Up
Even after treatment, thorough follow-up ensures infestations are fully eradicated and do not recur.
- Re-inspection Schedule: Check birds and environment 7–10 days after initial treatment, then weekly for several weeks. Repeat treatments as needed per product instructions.
- Record Keeping: Document treatment dates, products used, observed results, and any side effects. Track infestation patterns to refine future prevention.
- Behavioral Monitoring: Watch for lingering signs: scratching, pale combs, restless roosting. Quick action on early signs prevents full relapse.
- Environmental Checks: Continue coop sanitation and spot treatments for several weeks to break life cycle of mites and lice (eggs, larvae, adults).
- Consultation: If infestations persist despite standard treatments, seek veterinary advice for possible resistant parasites or underlying health issues weakening birds.
8. Case Examples and Practical Lessons
- Early Intervention Success: A keeper found light lice infestation on a few hens during routine check. Immediate dust bathing with DE and topical permethrin treatment cleared lice within two weeks, with minimal stress to birds.
- Red Mite Outbreak: Severe red mite infestation discovered when hens became restless at night and had pale combs. The keeper emptied coop, scrubbed and applied residual miticide, treated birds with approved spray, and sealed hiding spots. Repeated environmental treatments over several weeks eradicated mites; coop design was improved to minimize crevices.
- Scaly Leg Mite Challenge: A hen developed thick crusty leg scales causing limping. After soaking and careful scraping, sulfur-based ointment was applied weekly; bedding replaced with soft, clean substrate. After a month, legs returned to near-normal appearance and mobility improved.
- Quarantine Advantage: New hens introduced without quarantine brought lice into flock. After treatment of entire flock and adopting strict quarantine for future additions, reinfestation was prevented.
These examples highlight the importance of regular checks, combined bird/environment treatments, and improved management practices.
9. Integrating Pest Management into Routine Care
- Monthly Parasite Checks: Designate a regular date each month to inspect a subset of birds and coop areas.
- Seasonal Deep Cleaning: Plan deep-clean and treatment rounds before and after peak parasite season (spring and fall), ensuring environment is refreshed.
- Education and Observation: Train caretakers or family members to recognize early signs of mites or lice. Encourage reporting and prompt action.
- Rotate Treatment Methods: Vary treatments (chemical classes, non-chemical methods) to reduce risk of resistance among parasite populations.
- Maintain Backup Supplies: Keep key treatments (DE, approved sprays, soaks) on hand so infestations can be addressed immediately upon detection.
10. Summary of Key Points
- Chicken mites and lice cause irritation, blood loss, stress, and potential health decline; prompt detection and treatment are vital.
- Identify parasite type (mites vs. lice; red mite vs. northern mite vs. scaly leg mite) to choose appropriate treatment approach.
- Treat both birds and environment: chemical treatments (permethrin, ivermectin under veterinary guidance, sulfur for scaly leg mites) combined with thorough coop sanitation yield best results.
- Non-chemical methods (dust baths, manual removal, coop sealing) complement treatments but rarely suffice alone in heavy infestations.
- Prevention through regular inspection, quarantine of new birds, proper coop design, and ongoing sanitation reduces infestation risk.
- Safety: always follow product labels, use protective gear, observe withdrawal periods, and minimize environmental impact.
- Monitor post-treatment: re-inspect birds and coop over weeks to confirm eradication and address lingering pockets of parasites.
- Integrate pest management into routine flock care: schedule periodic checks, keep records, and adapt strategies based on observed patterns.
- Seek veterinary advice for persistent or severe cases, especially when systemic treatments or complex infestations are involved.
Conclusion
Maintaining a pest-free coop requires vigilance, consistent inspections, prompt treatments, and thorough sanitation. By understanding the biology of chicken mites and lice, recognizing early signs of infestation, applying effective treatments to both birds and environment, and integrating prevention measures into routine care, backyard poultry keepers can safeguard flock health and productivity. Regular monitoring, record-keeping, and adaptation of strategies to changing seasons and parasite pressures ensure long-term control. In cases of severe or persistent infestations, consulting a poultry veterinarian helps identify resistant populations or underlying health issues. A proactive, integrated approach keeps chickens comfortable, reduces stress, and supports a thriving, healthy flock.
