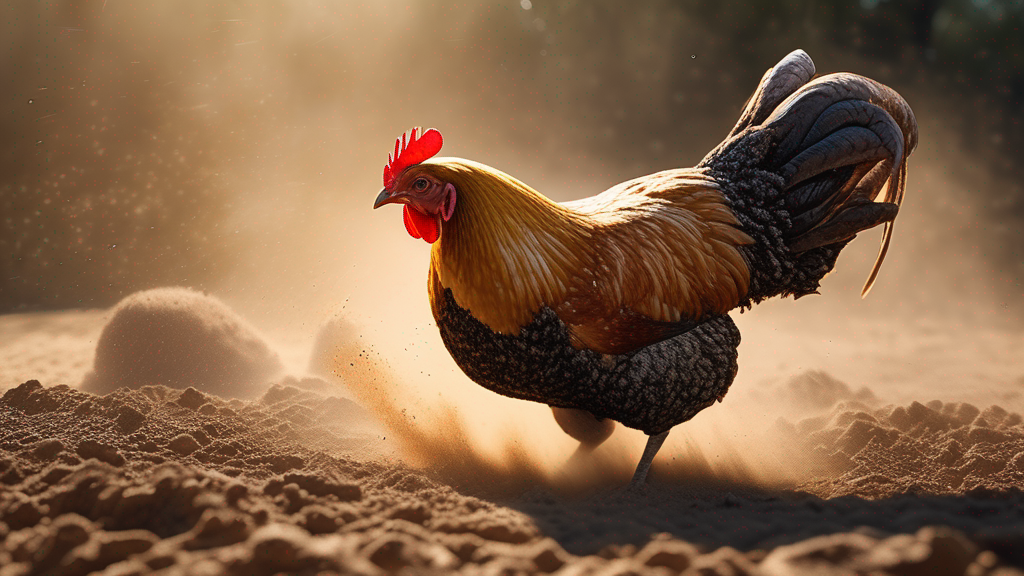
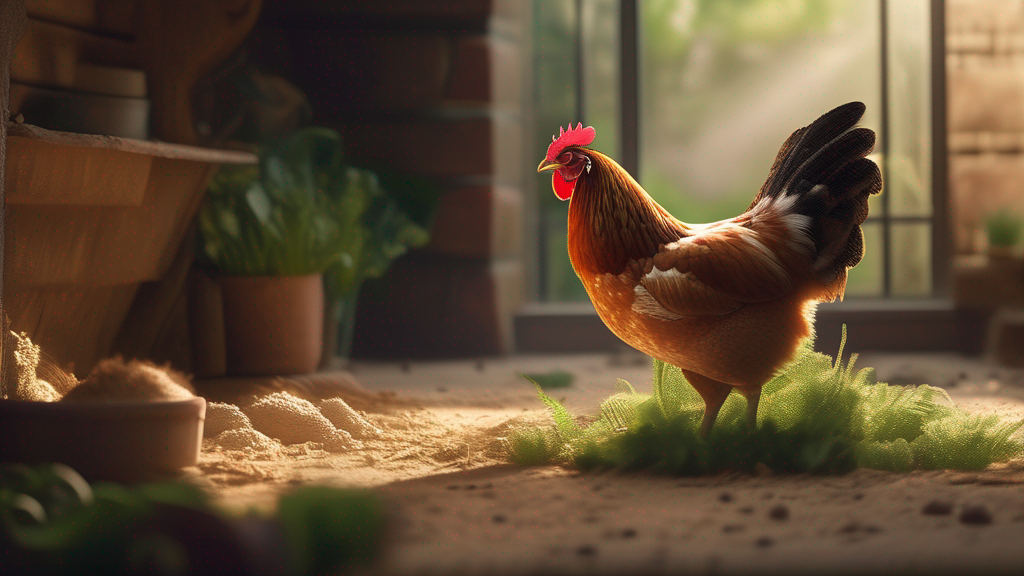
Dust bathing is an instinctive behavior in chickens that supports feather condition, skin health, and parasite control. A well-prepared dust bath area allows birds to maintain their plumage, regulate oil and moisture, and reduce external parasites like mites and lice. In this comprehensive guide, we explore why dust baths matter, ideal substrates and mixtures, placement and design considerations, maintenance routines, seasonal adjustments, enrichment ideas, safety precautions, and troubleshooting tips for a thriving flock with healthy feathers.
Why Dust Baths Are Crucial for Chickens
- Feather Maintenance: Dust removes excess oil and debris from feathers, keeping them supple and functional for insulation and waterproofing.
- Parasite Control: Fine particles penetrate the plumage and skin crevices, helping to dislodge or suffocate mites, lice, and other external parasites.
- Skin Health: Regular dust bathing stimulates healthy skin turnover, prevents buildup of dead skin cells, and may relieve mild irritations or dryness.
- Behavioral Enrichment: Chickens naturally seek out dust bath opportunities; providing a suitable area reduces boredom, frustration, and undesirable behaviors like feather pecking.
- Thermoregulation: In warm weather, dust bathing can help chickens cool off by removing excess oil that traps heat; in cooler weather it may still be used sparingly if conditions allow.
Signs Your Chickens Need a Dust Bath
- Frequent scratching at the ground and wing-flapping motions.
- Fluffed appearance or shaking movements to dislodge debris.
- Visible signs of mites or lice (small dark specks near the vent or base of feathers).
- Feather dullness or mild matting, indicating excess oil or dirt accumulation.
- Boredom behaviors: increased feather pecking, pacing around coop or run.
Ideal Dust Bath Substrates and Mixtures
No single material suffices in all climates or situations. A combination of substrates often yields the best results by providing varied particle sizes and properties. Below is a comparison table of common materials:
| Substrate | Role / Benefit | Pros | Cons |
|---|---|---|---|
| Play Sand (Fine, Washed) | Main bulk: abrasive action to clean feathers and skin | Readily available; good drainage; low dust compared to finer powders | May pack if too wet; provides limited mite control alone |
| Diatomaceous Earth (Food Grade) | Parasite control: abrasiveness and desiccant properties | Helps reduce external parasites; fine texture mixes well | Respiratory irritation if inhaled in large amounts; use sparingly |
| Wood Ash (Hardwood, Clean) | Edge effect: mild alkalinity, additional abrasive action | Byproduct of wood stove; helps deter mites; inexpensive | Can become caustic if too concentrated; avoid softwood charcoal ash; dusty |
| Peat Moss or Coco Coir | Absorbs moisture; improves texture and fluffiness of mix | Soft texture, retains dryness in humid conditions; reduces pack | May harbor mold if kept too moist; can be dusty initially |
| Garden Soil or Topsoil (Sterilized) | Bulk base: natural substrate with some grit | Readily available; moderate texture; birds often prefer natural soil | Risk of pathogens or chemicals if not sterilized; may contain weed seeds |
| Sand + Wood Ash + DE Mix | Balanced mixture for cleaning, parasite control, and drainage | Synergistic: sand for abrasion, ash and DE for parasite deterrence | Requires careful ratios to avoid excessive dust or causticity |
| Commercial Dust Bath Mixes | Pre-blended substrates sold for poultry | Convenient; often balanced for pH and texture | Cost may be higher; quality varies by brand; check ingredients |
Recommended Mixture Ratios
A general starting point for a balanced dust bath mix (adjust by climate and availability):
- 50% Fine Play Sand: Provides the main abrasive action and drainage.
- 20% Wood Ash (Hardwood, cooled and sifted): Supplies mild alkalinity and abrasion; caution in humid or wet conditions.
- 10% Diatomaceous Earth (Food Grade): Adds parasite-control properties; use sparingly to limit dust.
- 20% Peat Moss or Coco Coir: Improves texture, retains dryness, reduces compaction.
Adjust as needed:
- In humid regions, increase peat/coir to maintain dryness.
- In very dry, dusty climates, reduce DE and ash percentage or moisten slightly before offering (spritz with water) to minimize airborne dust.
- In winter or wet seasons, provide cover or indoor dust bath to keep mix from becoming soggy; consider adding fresh dry sand frequently.
Container and Placement Considerations
Choosing the right container and location ensures chickens use the dust bath and that the mix remains in good condition.
Container Types
- Plastic Kiddie Pools or Large Tubs: Easy to fill and move; depth of 6–8 inches allows full rolling behavior.
- Wooden or Metal Boxes: Constructed to size; ensure edges are smooth to prevent injury; line with hardware cloth under the base if drainage is needed.
- Built-In Dust Bath Area: In a run corner, dig shallow pit and line or shape sides; cover partially with removable lid or tarp when not in use to keep dry.
- Portable Bins: Allows relocating or rotating between flocks or seasons; helpful to move away from wet spots.
Ideal Location
- Dry, Protected Spot: Under partial shelter (e.g., roof overhang or shade) to keep rain off. In rainy seasons, consider an enclosed area or coop interior extension.
- Easy Access: Place at ground level or slight depression so chickens can easily jump in and out; avoid steep sides.
- Out of High-Traffic Areas: Position away from feeding or water stations to prevent cross-contamination with wet feed or droppings.
- Well-Ventilated but Sheltered: Good airflow helps keep substrate dry; shelter prevents wind from blowing dust all over and rain from wetting mix.
- Sunlight Balance: Some sun helps keep substrate dry; avoid placing entirely in deep shade where moisture may linger.
Depth and Space Requirements
- Depth: Aim for at least 6–8 inches of substrate depth so birds can fluff and roll fully, exposing feathers to abrasive action.
- Surface Area: Provide enough space so multiple birds can dust bathe concurrently—typically 2–3 square feet per bird. For a small flock (4–6 hens), a pool or area of 4–6 square feet works well.
- Multiple Baths: In larger flocks or runs, consider two or more dust bath stations to reduce competition and ensure subordinate birds get access.
Maintenance and Refreshing the Dust Bath
- Regular Inspection: Check substrate weekly for moisture, droppings, or clumping. Remove debris like large droppings or wet clumps.
- Replenish Substrate: Top up sand or peat/coir as needed to maintain depth. Replace portion of mix monthly or when visibly dirty or compacted.
- Drying After Rain: If outdoor bath gets wet, cover and let dry thoroughly before reuse. In persistent wet periods, consider moving bath under roof or indoors.
- Rotating Locations: Move bath periodically to fresh ground to avoid buildup of pathogens in one spot. Let previous area rest and dry out.
- Cleaning: Every few months, empty entire bath, clean container with mild detergent, rinse well, allow to dry, then refill with fresh mix.
- Dust Control: If mix becomes overly dusty in dry climates, lightly mist before use or reduce DE percentage. However, some dustiness is necessary for parasite control.
Seasonal and Climate Adjustments
Rainy or Humid Seasons
- Provide covered dust bath or indoor version to keep mix dry.
- Increase drainage: elevate container slightly or drill small holes with mesh underneath for water runoff (ensure hardware cloth prevents escape of substrate).
- Use materials that resist mold: avoid garden soil unless sterilized; prefer sand and peat/coir blends.
Winter and Cold Climates
- Chickens still benefit from dust baths but may avoid cold, wet substrate. Offer dust bath in a sheltered, dry coop corner with heated or insulated enclosure (not overly warm, but frost-free).
- Use dry sand and dry ash mixture; avoid moisture-rich components that freeze.
- Monitor that birds do not chill when bathing; limit exposure time by providing quick access and encouraging brief dust baths.
Hot, Arid Regions
- Dust baths may become very dry and dusty; maintain balance by occasionally misting lightly to reduce airborne dust.
- Ensure dust bath area is shaded so substrate does not overheat or bake, which could harm skin.
- Monitor for over-drying: if substrate turns to fine powder, mix in coarser sand or peat to maintain texture.
Enrichment and Behavioral Encouragement
- Encourage Use: Scatter a few scratch grains or small treats in the dust bath area—chickens will naturally dust bathe while foraging.
- Rotation: Move or rotate bath container occasionally to renew interest; chickens may investigate new locations eagerly.
- Companion Plants: Place potted herbs (e.g., lavender, mint) nearby; aromatic plants can enhance the environment and deter pests.
- Multiple Textures: Provide variation across baths: one with more sand-heavy mix, another with higher peat/coir content, so birds choose preferred texture on a given day.
Safety and Health Precautions
- Avoid Toxic Additives: Do not add chemical agents directly into dust bath (e.g., insecticides) unless veterinary-approved and applied in safe concentrations.
- Monitor for Respiratory Issues: Excessive fine dust (especially from DE or ash) can irritate respiratory tract. Use sparingly and ensure good ventilation; consider light misting if dust is excessive.
- Check for Contaminants: If using garden soil or compost, ensure it is free of pesticides, herbicides, or harmful microbes. Sterilize if in doubt (e.g., by solarization or baking small batches).
- Parasite Considerations: While DE and wood ash can help deter mites, they are not a sole control method. Continue routine parasite monitoring and treatment protocols as needed.
- Watch for Injuries: Inspect substrate for sharp debris, rocks, or metal fragments that could injure skin or feet.
Troubleshooting Common Issues
Chickens Avoiding the Dust Bath
- Check substrate condition: if too wet, too dusty, or contaminated, chickens may avoid it. Refresh mix or relocate to a drier spot.
- Ensure easy access: container too deep or edges too high can deter less agile birds. Provide ramp or shallower depth initially.
- Observe timing: chickens prefer mid-morning or after foraging; avoid offering bath immediately after coop cleaning if odors discourage use.
Excessive Dust Causing Coughing
- Reduce proportion of DE or ash; increase sand or peat/coir.
- Lightly mist substrate before use to settle fine particles.
- Improve ventilation in area to disperse airborne dust quickly.
Mold or Odor in Substrate
- Remove wet clumps or spoiled material promptly.
- Move bath to a sunnier or better-ventilated location to dry out.
- Replace portion or all of mix with fresh, dry substrate.
- Avoid organic-rich substrates (e.g., manure-based compost) that may harbor mold; stick to sand and inert materials.
Runoff and Mess in Surrounding Area
- Contain dust bath in a defined container or shallow pit to prevent spread of substrate throughout run.
- Use a removable liner or tray beneath container to collect spilled material for easy cleaning and reuse.
- Encourage chickens to dust bathe in a quieter corner away from feeders, reducing mixing of feed and dust.
DIY Dust Bath Recipes
Here are a few sample mixes to suit different conditions. Adjust quantities to fill your chosen container size (e.g., a kiddie pool or wooden box):
Basic Sand-and-Ash Mix (Temperate/Dry Climates)
- 5 parts fine play sand
- 2 parts cooled, sifted hardwood ash
- 1 part food-grade diatomaceous earth
- Mix thoroughly and fill to 6–8 inches depth.
Humid Climate Mix
- 4 parts fine play sand
- 3 parts peat moss or coco coir (ensure dry before mixing)
- 1 part hardwood ash (sifted)
- 0.5 part diatomaceous earth
- Lightly mist after mixing to settle dust; place under shelter.
Winter/Sheltered Coop Mix
- 6 parts sand (dried indoors if needed)
- 1 part peat moss (kept inside to stay dry)
- 0.5 part DE (use minimal amount)
- Ensure bath is in a draft-free, dry corner; replace regularly to prevent compaction.
Enrichment-Enhanced Mix
- 4 parts sand
- 2 parts peat moss
- 1 part ash
- Optional: a handful of fine wood shavings for variety (ensure soft and clean)
- Sprinkle a few mealworms or dried herbs on top to encourage initial investigation.
Frequently Asked Questions (FAQs)
How often should I refresh the dust bath?
Inspect weekly; top up sand or peat/coir as needed. Replace or thoroughly stir the mix monthly or when dirty/clumped. Entire replacement every 2–3 months ensures cleanliness.
Can baby chicks use the same dust bath?
Chicks also dust bathe instinctively but need a shallow, gentle substrate. Provide a small tray with fine, clean sand mixed with minimal ash and DE. Keep depth shallow (2–3 inches) and supervise to prevent chilling or over-dusting. Ensure substrate is dry and free of sharp particles.
Is diatomaceous earth safe for chickens?
Food-grade DE used sparingly can help control external parasites. Avoid inhalation by limiting dust cloud. Mix into substrate rather than sprinkling heavily on birds. Always provide good ventilation.
Can I add essential oils or herbs to the dust bath?
Strong essential oils may irritate respiratory tracts; generally avoid adding oils directly. Some keepers sprinkle dried herbs (e.g., lavender, mint) near or around the dust bath for mild aromatherapy and insect deterrence, but not mixed into substrate. Ensure herbs are safe for poultry.
How do I prevent dust bath substrate from freezing?
Move dust bath indoors or under shelter during freezing weather. Use dry sand only or minimal peat. Place in a frost-free coop corner with adequate insulation. Chickens can briefly bathe in cold if the substrate is dry and ambient temperature above freezing, but extended exposure in freezing conditions is not advisable.
My run is small; how can I provide a dust bath?
Use a compact container (e.g., shallow rubber tub) sized to allow one or two birds at a time. Rotate usage times if flock is large. Place inside coop if needed, ensuring the area is easy to clean. Even a small dedicated dust bath is better than none.
What if my chickens scratch out all the substrate?
Contain substrate in a tray or bordered area to minimize loss. Line edges with boards or bricks. Periodically collect scattered material and return to bath if still clean. Top up regularly to maintain depth.
Summary of Best Practices
- Provide a dedicated, adequately sized dust bath area: minimum 6–8 inches deep and 2–3 sq ft per bird.
- Use balanced substrate mixtures: primarily clean sand, supplemented with peat/coir, wood ash, and small amounts of food-grade DE.
- Locate dust bath in a dry, sheltered spot: under roof or shade, away from feeders and wet areas, with good ventilation.
- Maintain and refresh regularly: inspect weekly, remove debris, replenish materials, and fully replace periodically.
- Adjust for climate: cover or move indoors in wet or freezing conditions; mist lightly in very dry climates to reduce dust.
- Encourage use through enrichment: scatter treats or herbs nearby; provide multiple textures or rotating locations.
- Monitor health and safety: avoid toxic additives; limit excessive dust; check for injuries or respiratory signs.
- Observe flock behavior: ensure all birds get access; provide multiple baths if needed to prevent competition.
Conclusion
Dust bathing is a natural, vital behavior for chickens, contributing to feather health, parasite control, skin condition, and mental well-being. By providing a properly designed dust bath—with suitable substrates, correct depth, sheltered placement, and regular maintenance—you enable your flock to perform this instinctive behavior effectively. Adjust mixtures and locations according to season and climate, and enrich the experience to keep birds engaged. With attention to safety, cleanliness, and accessibility, you will support healthy feathers, reduce parasitic issues, and enhance overall flock happiness. A well-managed dust bath is an essential element of comprehensive poultry care, helping chickens look, feel, and perform their best.